How to connect keyboards to computers
Equipment
Once you have gathered all the necessary equipment, connecting your digital piano to an external device is straightforward.
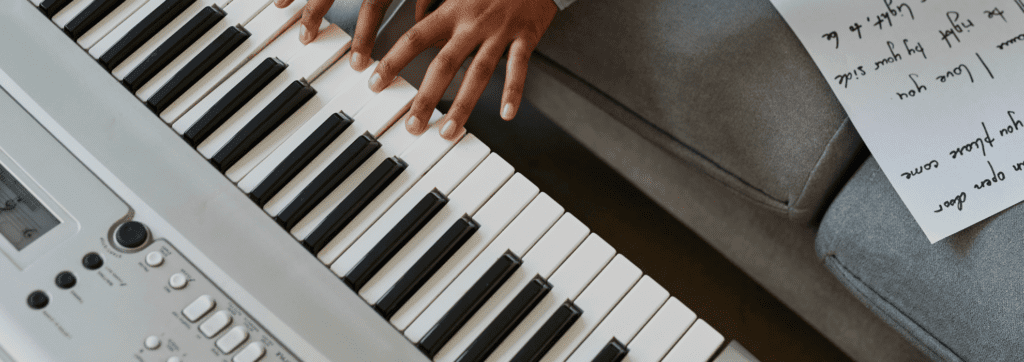
The first step is to acquire a cable that can be plugged directly into your keyboard. The type of cable required depends on the model of your keyboard. It can be either a MIDI to USB cable converter or a USB Type A to Type B cable. Both cables enable you to connect your keyboard to a computer, Android device, or Apple device to transfer MIDI data. It is important to note that MIDI (Musical Instrument Digital Interface) is a communication protocol allowing electronic musical instruments and computers to interact.
When you play a key on your keyboard, use a sustain pedal, or utilize any other controller on your instrument, MIDI messages are generated. These messages convey information about which key was pressed, the amount of pressure applied, the duration of a note, and more. These MIDI messages can be transmitted to your computer and recorded as a MIDI file. Additionally, they can be used to control various music-making and learning applications, which will be discussed in the following sections. Most modern keyboards are equipped with a USB Type B port, while older keyboards and professional-grade instruments may feature dedicated MIDI In/Out ports for MIDI connections.
It is worth mentioning that if you come across a USB Type A port on your keyboard, it cannot be used for transferring MIDI data. Its purpose is solely for inserting a flash drive to save recordings made using your keyboard’s internal sounds.
Connecting to a computer
Connecting your digital piano to a computer is a simple process, requiring only one cable. The steps vary depending on the type of ports available on your keyboard.
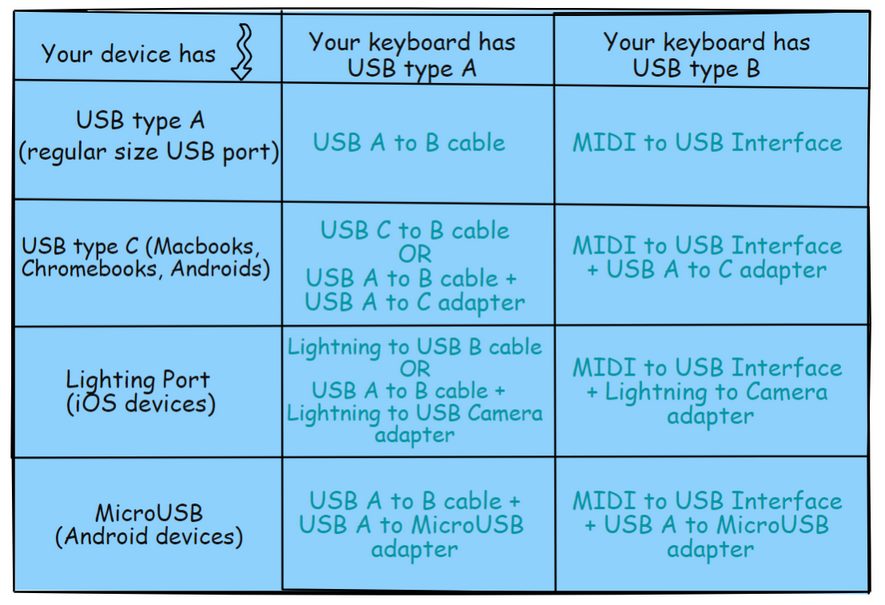
- If your keyboard has a USB Type B port (also known as USB to Host), you will need a USB A to B cable. Connect the B-end of the cable to your keyboard and the A-end to the USB port on your computer.
Note: If you have a newer MacBook (2016 or later) without regular-sized USB ports, you will need a USB C to B cable instead of the USB A to B cable. - If your keyboard doesn’t have a USB Type B port, it likely uses traditional 5-pin MIDI In/Out ports. In this case, you will need a MIDI to USB interface. These interfaces can be purchased from Amazon or local electronics stores for under $50. The iConnectivity mio is a reliable MIDI to USB interface option. Connect the USB A end of the cable to your computer’s USB port. Connect the MIDI In end to the MIDI Out port on your keyboard, and connect the MIDI Out end to the MIDI In port.
You might wonder why the In end is connected to the Out port and vice versa. Think of MIDI as a signal flow, where you want the MIDI to flow out of your keyboard, into your computer, and then out of your computer to your speakers. This setup allows for the movement of sound and data communication between your keyboard and computer.
It’s worth noting that while older keyboards often feature only MIDI In/Out ports, many modern keyboards now come equipped with both MIDI and USB Type B ports.

Connecting to an iOS or Android device
Here, the process becomes slightly more complicated due to the lack of full-size USB ports on mobile devices. To connect your keyboard to a mobile device, you will need to acquire an additional adapter in order to use a USB A to B cable or a MIDI to USB interface. Alternatively, you can attempt to find a single cable that directly connects your keyboard to your mobile device. However, please note that such cables may not always be available or may be quite rare. If you’re unsure about which cable to use for your specific device, feel free to leave a comment below, and we will be more than happy to assist you!
If you only require a Lightning connection, you can utilize the Lightning to USB Type B connector. Using this approach has several advantages, including the need for only one cable, reduced bulkiness, and cost savings. However, it’s important to note that relying solely on this method may not be as reliable as using two separate cables. Additionally, finding these single cable solutions can be challenging, and they have a tendency to be more fragile and prone to breaking.
When connecting your digital piano to an Android device, the process is similar to connecting an iOS device, but there are some key differences. The main distinction lies in the requirement of a different cable, as the Lightning Adapter is not compatible with Android devices.
To connect your keyboard to an Android device, you will need either:
An OTG (On-The-Go) USB Type A to Micro USB adapter if your Android device has a microUSB port. This adapter allows you to connect a USB Type A cable to your Android device.
OR
An OTG USB Type A to USB Type C adapter if your Android device features a USB Type C port. This adapter enables you to connect a USB Type A cable to your device.
In either case, you will still need a USB A to B cable (or a MIDI to USB interface if your keyboard has MIDI In/Out ports). Plug one end of the USB A to B cable into your keyboard, and the other end (USB-A) into one of the aforementioned adapters.
Alternatively, you can consider purchasing a USB Type C to B cable. This cable allows you to connect directly to your Android device if it has a USB Type C port, eliminating the need for a second cable (USB A to B).
However, if your Android device utilizes a microUSB port instead of a USB Type C port, you will still require two cables.
Please note that I couldn’t find a single cable that provides a direct connection between a microUSB port and a USB Type B port (or MIDI In/Out).